After spending much of March and April preparing to plant barley, I have resolved myself to the fact that it is not going to happen this year. Barley grows best in very cool to cold temperatures and typically San Diego has it's coolest weather in April, May and June...hence the term May Gray and June Gloom. Our skies are usually overcast and the weather is typically very cool (by San Diego standards); however winter and spring never arrived in San Diego. Summer 2013 rolled right over into Summer 2014 and we lacked the weather that is optimal for barley growth. Here's our 5 day forecast to give you an idea of the weather we are having.
Suffice it to say, I will try again next year!
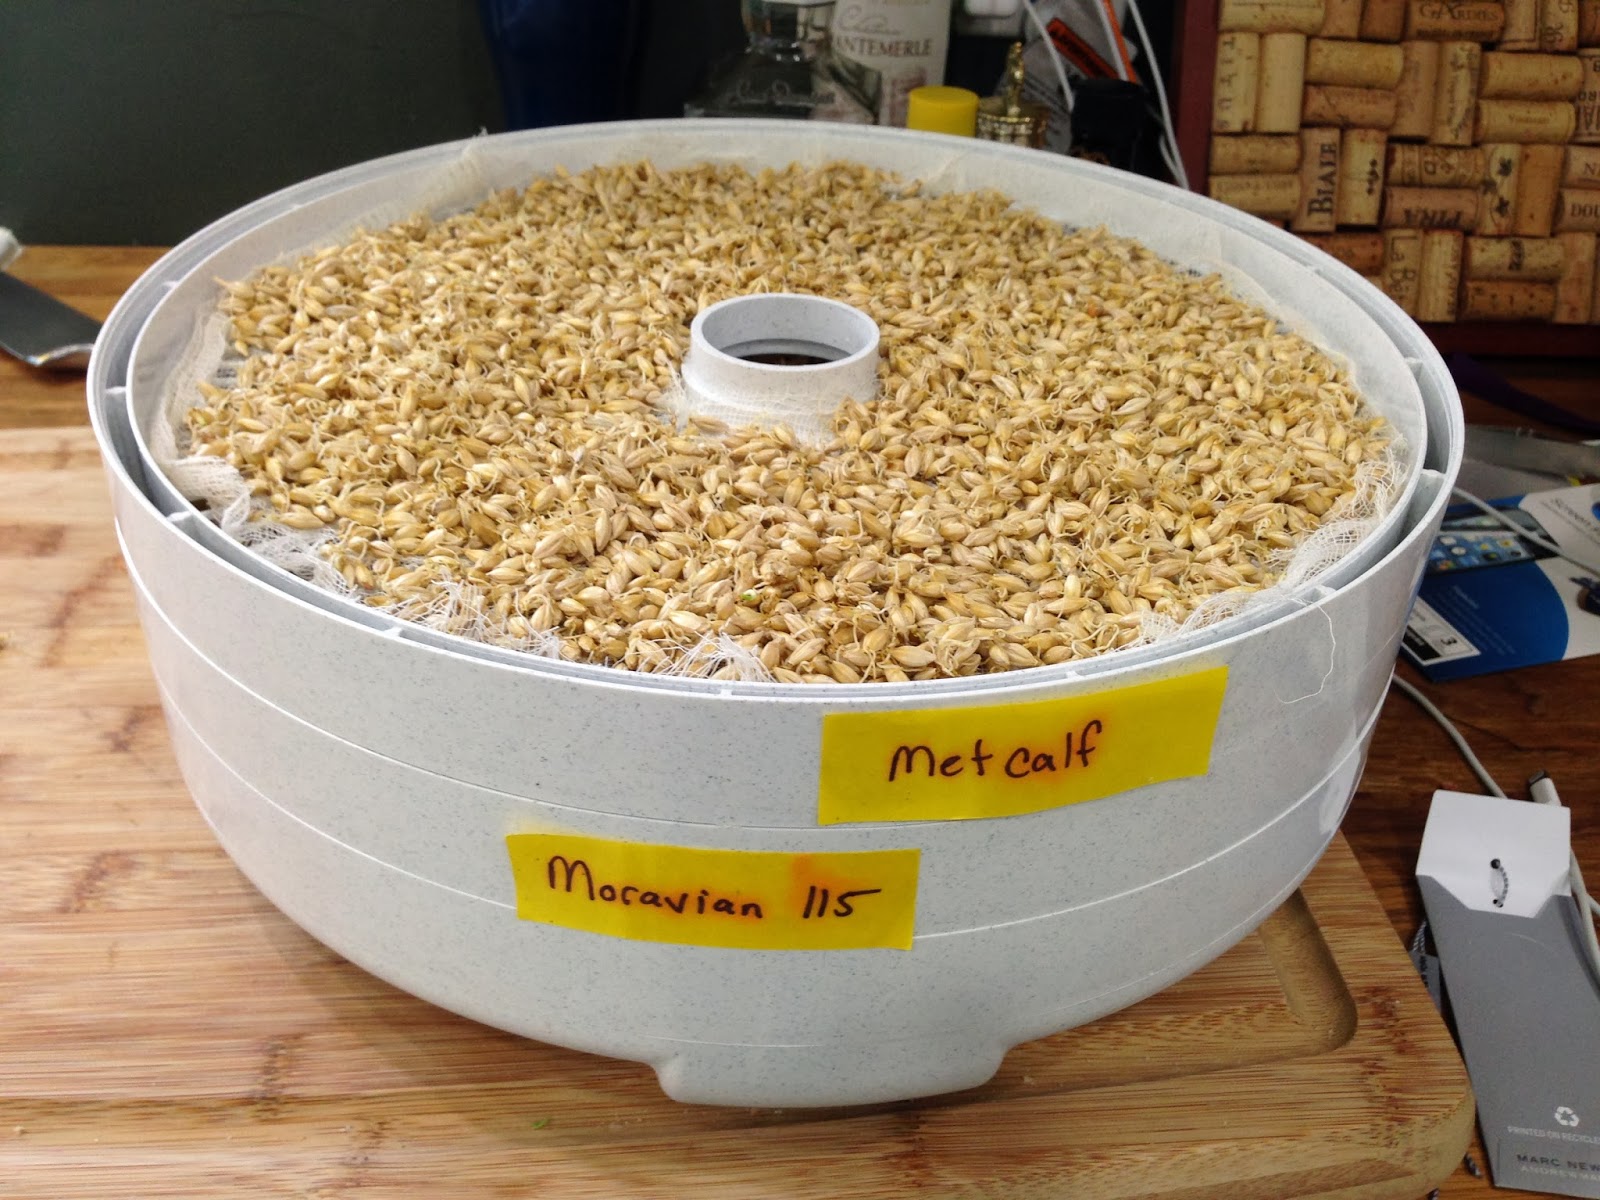
In the meantime I have done a third and what I would consider my best batch of pale malted barley to date! The flavor is by far the best out of my three batches and I think I'm ready to start experimenting with roasting and smoking my malt to make special varieties. I'd like to try and make a chocolate malt!
To continue moving forward my husband wants to crack the grain so we can convert the starches to sugar in a mash to make wort. We want to test the degree of modification. If we get good starch to sugar conversion compared to that of store-bought base malt, then we know I'm not over or under modifying my barely. Only problem is we don't have a grain mill. So it looks like we will be looking to purchase one on the cheap, I'm considering getting the one that attaches to my Kitchenaid mixer. I'm looking for the least expensive but most efficient option since my husband is officially leaving his corporate job to pursue employment in the brewing industry.
My husband is now into his Finishing Practices class and getting started on Part 2 of the Brewing Certificate...Business of Brewing. He is ready to apply the knowledge and skills he has gained. We are both very excited for his next step...whatever it may be! Guess that means I have to keep my day job! I wonder if I can pay our mortgage with malt?
San Diego is arguably the top spot for craft brewing in the USA, maybe the world. My husband is currently in the professional brewing program at UCSD. I was looking for a way I could contribute to this industry and support my husbands passion for craft brewing. Gardening and malting was the answer! What follows in this blog is an accounting of my efforts to become a Maltster with plans to plant two-row barley in the spring and malt my yield!
Barley Field
![Barley Field](https://blogger.googleusercontent.com/img/b/R29vZ2xl/AVvXsEjhOfl0symnbclfYlV4ApfLz5YLOvHev38yWnbfbw_4iyEQTZfFfRsTI9wmQhyphenhyphenqxcZ9kpDvlss8_0Fm2WvXub-j68I9P2da7JFcaCjYewY9XvAGckQW5RJ9xHaBG2oraoXoH0iOyF8K/s1600/Barley+Field+Golden.jpg)
Wednesday, April 30, 2014
Tuesday, February 25, 2014
Increased Interest in Growing Malting Barley
The American Malting Barley Association press release (2/19/2014) titled "Increased Interest in Growing Malting Barley" supports the micro-malthouse missions! Grow and support local! There is a need for malting barley varieties throughout the USA. Click the screenshot below to read the press release!
Friday, February 21, 2014
Second Batch Success & Barley Malting Equipment!
The second batch of malting turned out to be a great success. I think it is important to note that through the malting process you lose some malt/weight along the way. This is due to cleaning the barley and removing dirt and foreign materials, removing any floating barley and dehydrating it to a lower weight than the seeds you begin with. For this batch I started with 1.15 LBS of barley and by the time I was done malting it weighed .960 LBS.
Due to limited space in my food dehydrate I had to kiln the varieties of barley separately. Thus they ended up reaching different conversion rates. I started with the Moravian which was about 80% converted when I began kilning, the Metcalf I kilned the next day and was 100% converted. Also, I got tired during the kilning process so for the Moravian I did it in two stages. I kilned it for about six hours slowly raising the temperature from 95F to 125F until it was less than 12% moisture. Then I let it sit and finished kilning the next day at about 140F until it reached my goal of 3-6% moisture.
Both varieties are between 3-6% moisture, and are your basic pale malt. I did not roast either of them. Here is a picture of the final product...
Next steps...
- My husband will be taking some of the base malt above to his Raw Materials class to have the teacher try it out. We will be doing a mini-mash to see how it turns out.
- I'm preparing two 4'x4' plots to plant my barley in. The temperatures are not cooperating, but I'm hopeful for gray skies (first time I've ever wanted overcast cool weather!). I'll be posting updates as the barley begins to grow. I'm planning to soak the seeds before planting to help keep them cool when in the ground.
- I'm also beginning to look at how I can do larger batches of malting. I'm learning that good equipment makes a difference in the final products. I've been doing some research to see what is available commercially and unfortunately it is VERY LIMITED! I've found two resources that caught my eye and if this is something I decide to continue to pursue I might be looking to post on kickstarter to get some funding so I can do larger batches, those who would donate to the cause would get a batch of malted barley! Here are the two resources I've found so far http://osuminimalter.weebly.com/ and HDP Brewing Systems pilot malting plants (screenshot below).
Wednesday, February 12, 2014
Germination 24 hours later...
I've been rotating the germinating barley every 8-10 hours to prevent the roots from tangling. During the rotation I provide it one light spray of water to keep the moisture content up, but not soaked. After 24 hours germination is doing exceptionally well...much quicker than last time! The temperature of the barley this morning during rotation was 64º F.
After 24 hours |
So far the changes I've made seem to be working! Here are the changes I've made so far since the first batch.
1. Bought a grain moisture tester and got accurate beginning moisture content.
2. Malted more barley at once.
3. Steeped using colder water and for longer
4. Germinated using enclosed aluminum pans with holes in lid to maintain higher moisture.
5. Did not rotate germinating barley for first 12 hours.
Tuesday, February 11, 2014
When you see Chit...
Batch #2 is well underway. I tested the moisture level of both varieties last night and it was at 42%. 45% was my goal so I allowed it to steep another 8 hours over night and this morning prepped for germination. Nearly all the grains have begun to chit which is another sign it is ready to begin to germinate.
The next step is germination, which I'm making a few modifications to from my first batch. Last time, I felt the barley became too dry and took longer to germinate. This time I put the barley into containers with a moist paper towel at the bottom. I put aluminum foil with a few punctures over the top to keep contaminants out and moisture in. I am going to leave the barley in our cold room the entire time, unlike last time when I brought it out and it rose in temperature.
Saturday, February 8, 2014
Batch #2
Ladies and gentlemen, I'm pleased to present my grain moisture tester! After a few weeks of searching for one that I could afford I found this new one listed on ebay! It works for barley and I'm starting to do my second batch of malt.
The moisture content for the Metcalf is 10.9%, for the Moravian 115 it is 9.8%. Both were lower than I expected and lower than what I had estimated it to be during my first batch.
I'm malting my second batch now. I'm doing 1.150LBS each of the Moravian and Metcalf. They are doing their initial steeping now.
Monday, January 20, 2014
WANTED: GRAIN MOISTURE TESTER AND COLD WEATHER!
My husband asked me when I was planning to malt another batch of barley. I'm anxious to go through the process again with some modifications. Before I do another batch, I want to buy a barley moisture tester. The cost on these can run from a few hundred to thousands of dollar$$$. I've been keeping an eye out online for a used one that won't break the bank.
In the meantime, I'm preparing to replace my raised vegetable gardens with barley. We've had an unusually hot winter making it less than ideal to plant at this time. Barley germinates best in cool weather so I'm not planning to put down any seed until the weather cools down, hopefully in mid-to-late February which is our wettest month, then allow it to grow through our "gray" cool spring months (April, May and June here in San Diego). Yes, I know I'm sitting here in a t-shirt and flip-flops complaining about 80ºF weather in January! I figure at least others can live vicariously through the picture below.
Monday, January 13, 2014
We have Amber Malt!
It's been an interesting process but I have officially malted my first batch of barley.
The roasted malt will settle its flavor in the next two weeks.
After spending too much time in the dehydrator I removed the rootlets.
At this stage I now have my basic pale malt and it tastes slightly sweet. However, I decided I wanted to do a specialty malt and roasted the malt to create an Amber malt. Below you can see the color difference between the pale malt (left) and the Amber malt I roasted (right).
There are several things I will do differently in my next batch. I'm also looking into buying something to help me determine the moisture content of barley. I found that much of the process centers around moisture and you can't rely solely on average times for steeping, germination, and kilning. The average times for each part of the process can very greatly depending on many factors including amount of grain being malted, moisture content, etc.
Thursday, January 9, 2014
Time to kiln...finally!
So...germination had a few hiccups but I'm finally at the point of being ready to kiln. The acrospire is about three-quarters the length of the grain and there are about four rootlets on the barley grain.
Germination took twice as long as expected. I have a few theories about this, the most likely being that it got too dry. I did rotate and spray the barley down every day with water, but the climate here is very dry and it was hard to keep on top of maintaining a consistent moisture level...thinking of investing in a humidifier for the cold room I used for germination. I'm still optimistic as I've read that the slower the germination the better and it can take longer than the 5ish days on average Maltsters typically quote for germination.
Needless to say, this is an experiment and I'm learning. Luckily the barley didn't die and I'm ready to kiln!!
I will be kilning at 100°F for about 22-24 hours. I will then increase the temperature to 150°F for 2-4 hours until the moisture of the barley is as close to 3% as I can get (anything less than 6% should be fine from what I've read). Once I've reached 3-6% moisture level I will remove the dried rootlets and roast for about 30 minutes at 350°F to produce an Amber malt.
Subscribe to:
Posts (Atom)